
Use Roles and Permissions Console#
The Roles and Permissions console is where you manage team access for courses and libraries in Studio. This article describes the main areas of the console: the Team Members tab, the Roles and Permissions tab, and the user audit view.
Note
This feature is not enabled by default, and must be enabled by your site administrator. See Enabling RBAC in Verawood for instructions on how to enable it. For more on what’s included in this release, see Introducing More Granular Team Management.
Access the Console#
From the Studio home page, select Roles and Permissions in the top right corner. This opens the Roles and Permissions console in a new browser tab.
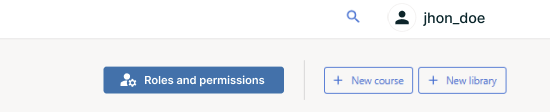
When you open it from the Studio home page, all courses and libraries you have access to are shown. When you open it from within a specific course or library, the view is prefiltered to show only that course or library’s team. The console is always the same interface.
Team Members Tab#
On the Team Members tab, you can see all users with a role assignment on the courses and libraries you have access to.
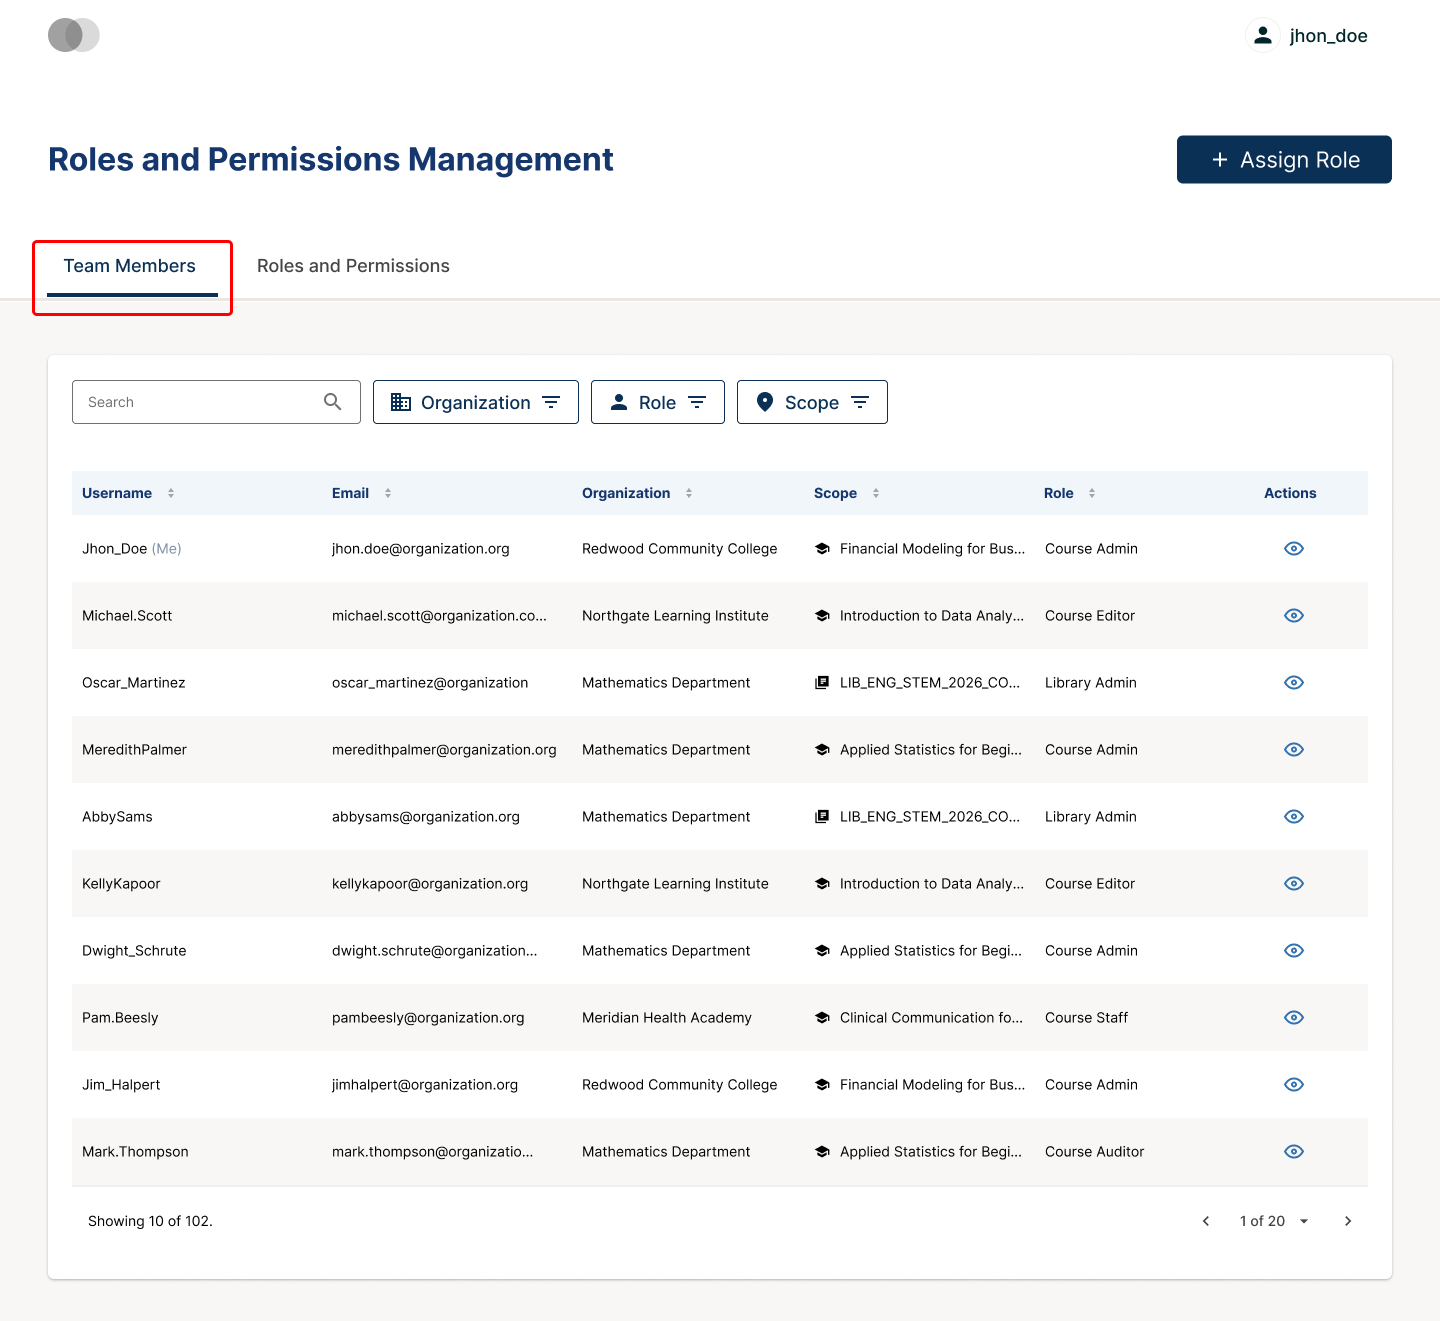
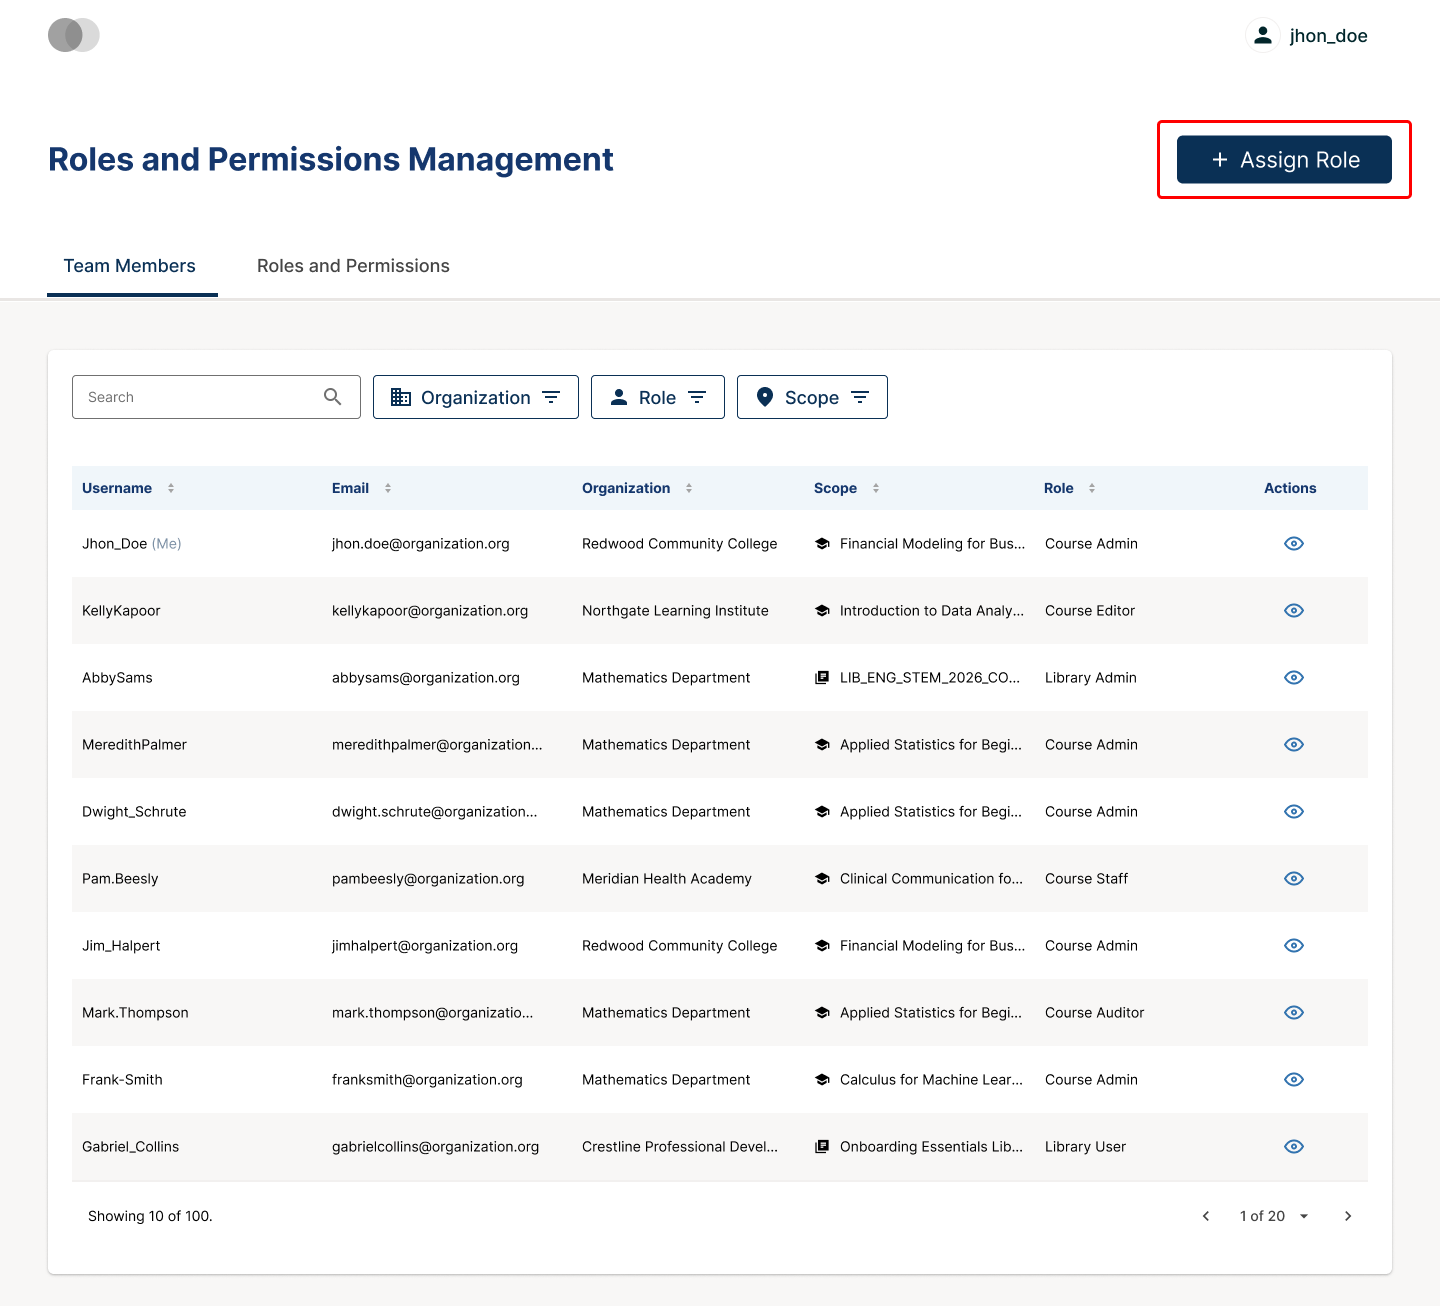
The table has six columns: Name, Email, Organization, Scope, Role, and Actions. Each row represents one role assignment. A user with multiple assignments appears once per assignment.
Your own account is identified with a “(me)” label next to your username.
The table shows 10 rows per page. Use the previous and next arrows or the page selector to navigate through results.
Note
The table only shows users with a role on the courses and libraries you have access to. You may not see all users on your platform.
Additionally, if the feature is not enabled for a specific course, the option to open the audit view is unavailable. A message explains why. Please contact your site administrator to enable the feature.
Search and Filters#
You can search for users and narrow the list using three filters.
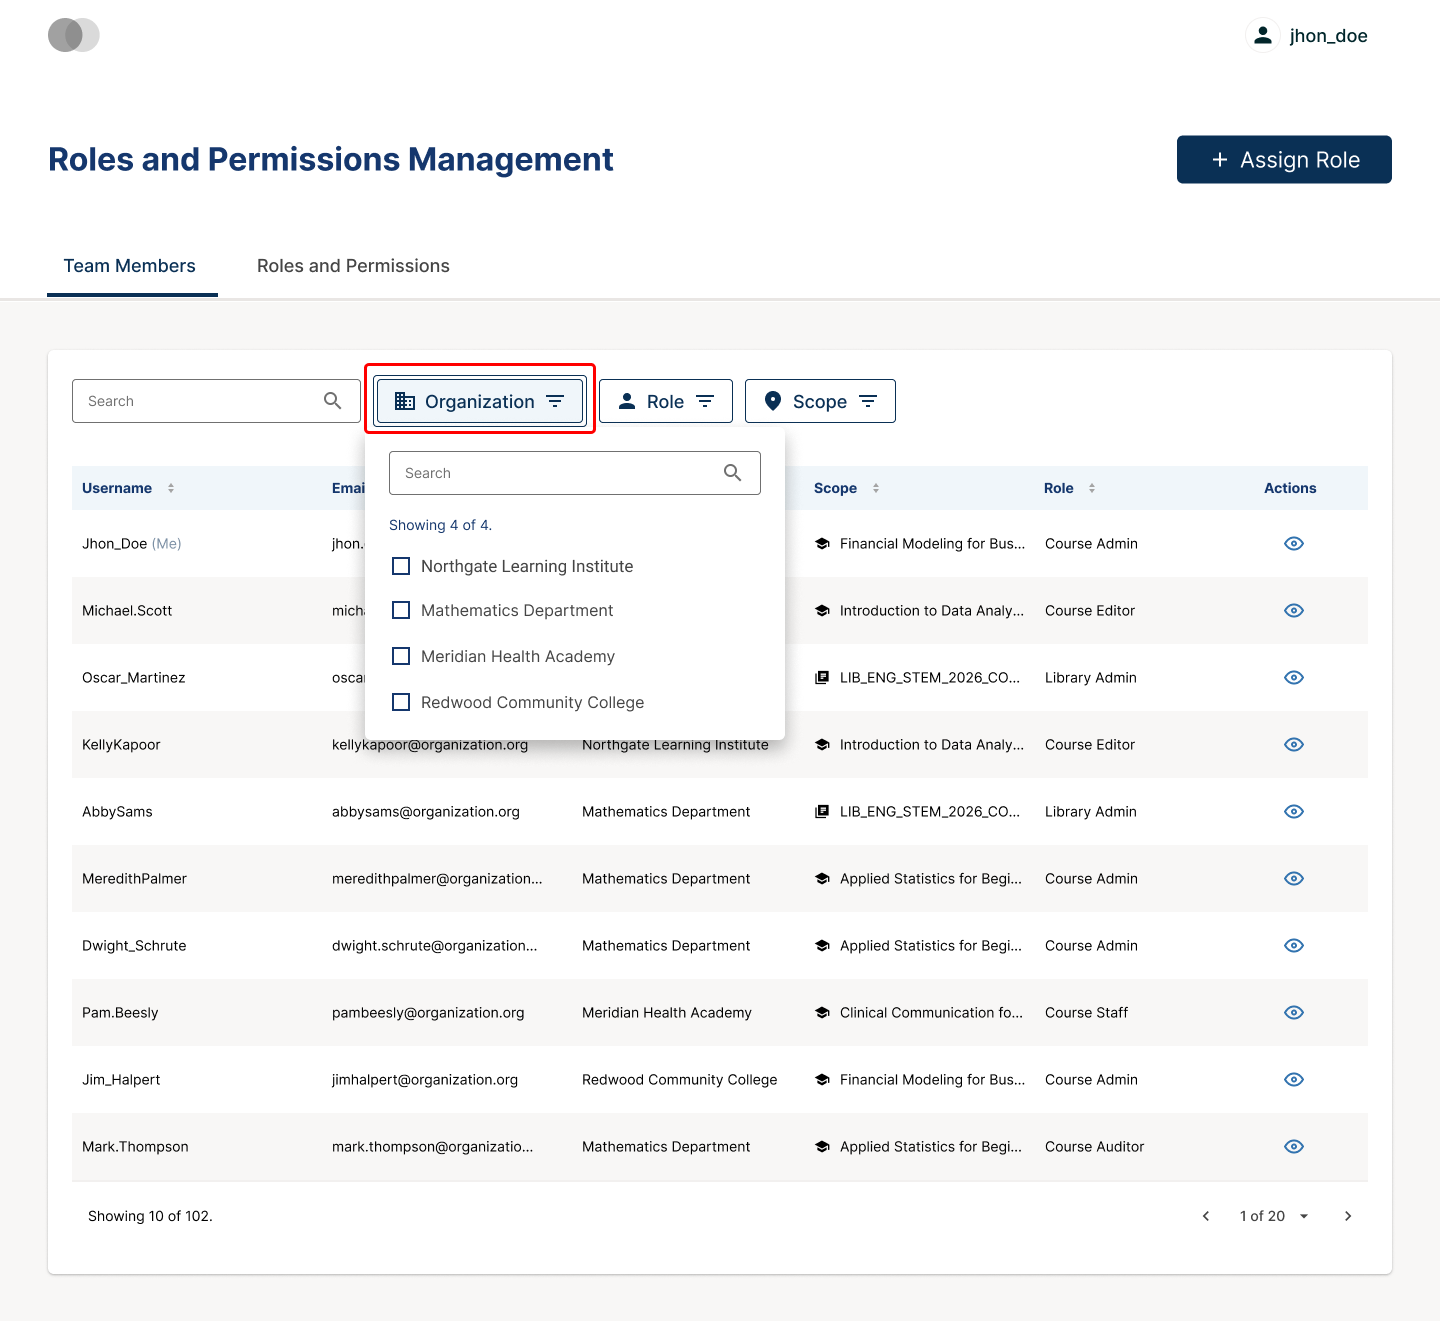
The search bar filters by user name and email.
The Organization filter shows a list of organizations. You can search within the filter to find a specific organization. Select one or more to narrow results.
The Role filter lists all available roles, grouped by course and library names. Select one or more roles to narrow results.
The Scope filter shows a list of courses and libraries. You can search within the filter to find a specific course or library. Select one or more to narrow results.
Active filters show a count badge and appear as tags below the filter row. Select the X on a tag to remove it, or use Clear all filters to reset the view.
The Scope filter only lists courses and libraries you have access to.
User Audit View#
You can view all role assignments for a specific user across the courses and libraries you have access to.
In the Team Members tab, select the option to view their role assignments in the Actions column for the user you want to review.
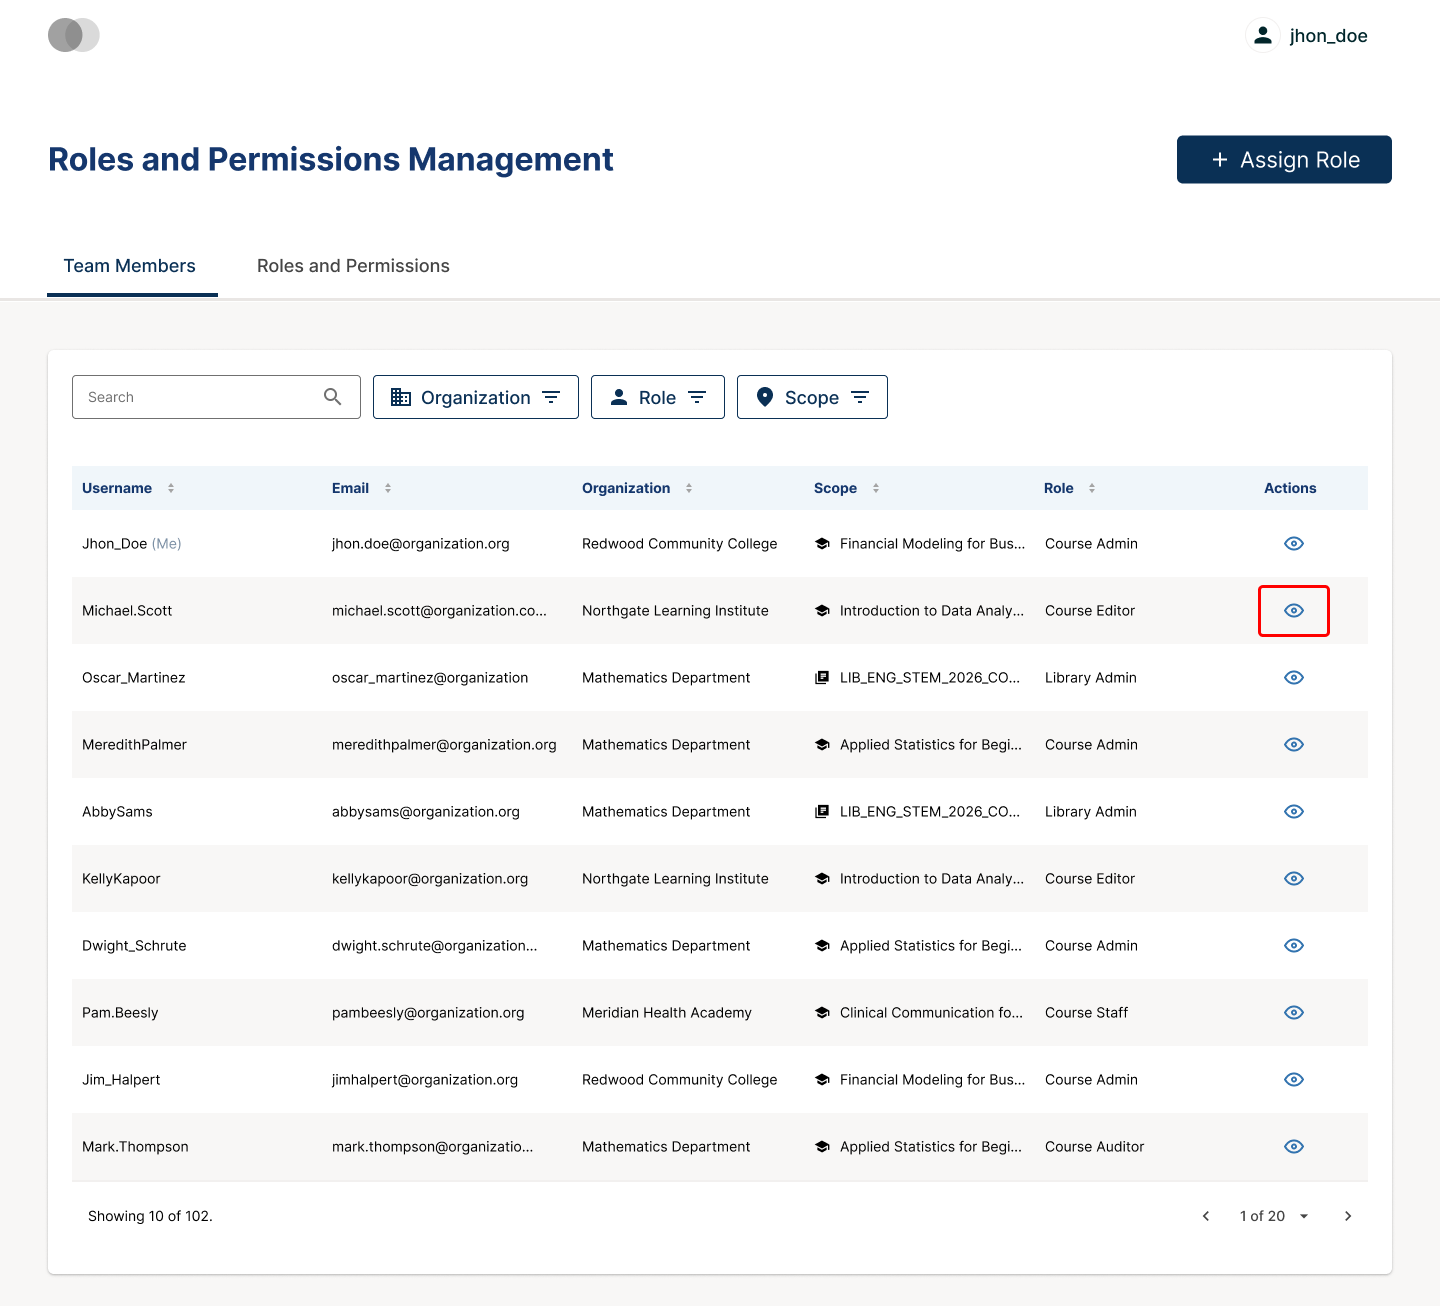
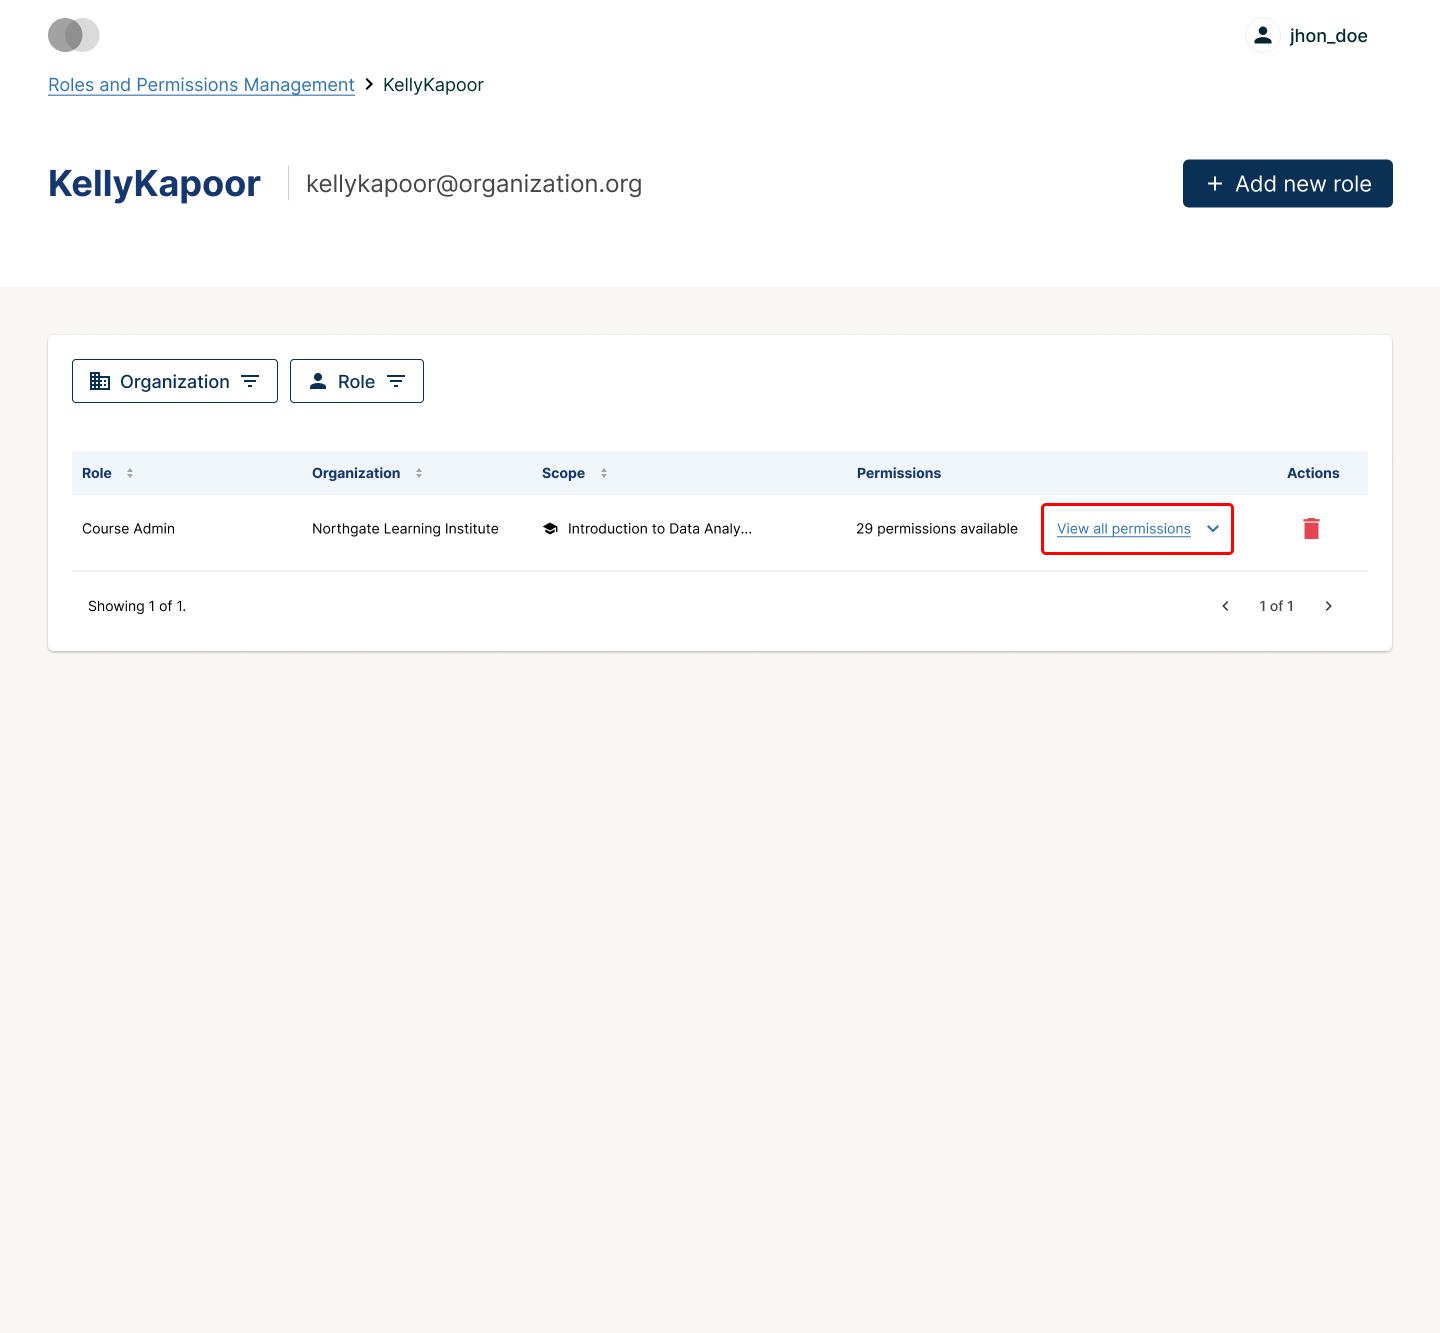
The user audit view shows all role assignments for that user. The table has the following columns: Role, Organization, Scope, and Actions.
Each row represents one role assignment. Use the Organization and Role filters to narrow the view.
Select the View All Permissions control in any row to expand a list of all permissions associated with that role, grouped by functional area.
Note
The role assignments shown are limited to the courses and libraries you have access to. If your access is limited to one course, you will only see assignments related to that course.
Note
A role assignment tied to a course where the Course Authoring flag is disabled still appears here. The option to remove it, if you have the permissions, is unavailable, with a message explaining why.
Roles and Permissions Tab#
The Roles and Permissions tab shows a permission matrix for course and library roles. Use it to understand what each role allows before assigning it to a team member.
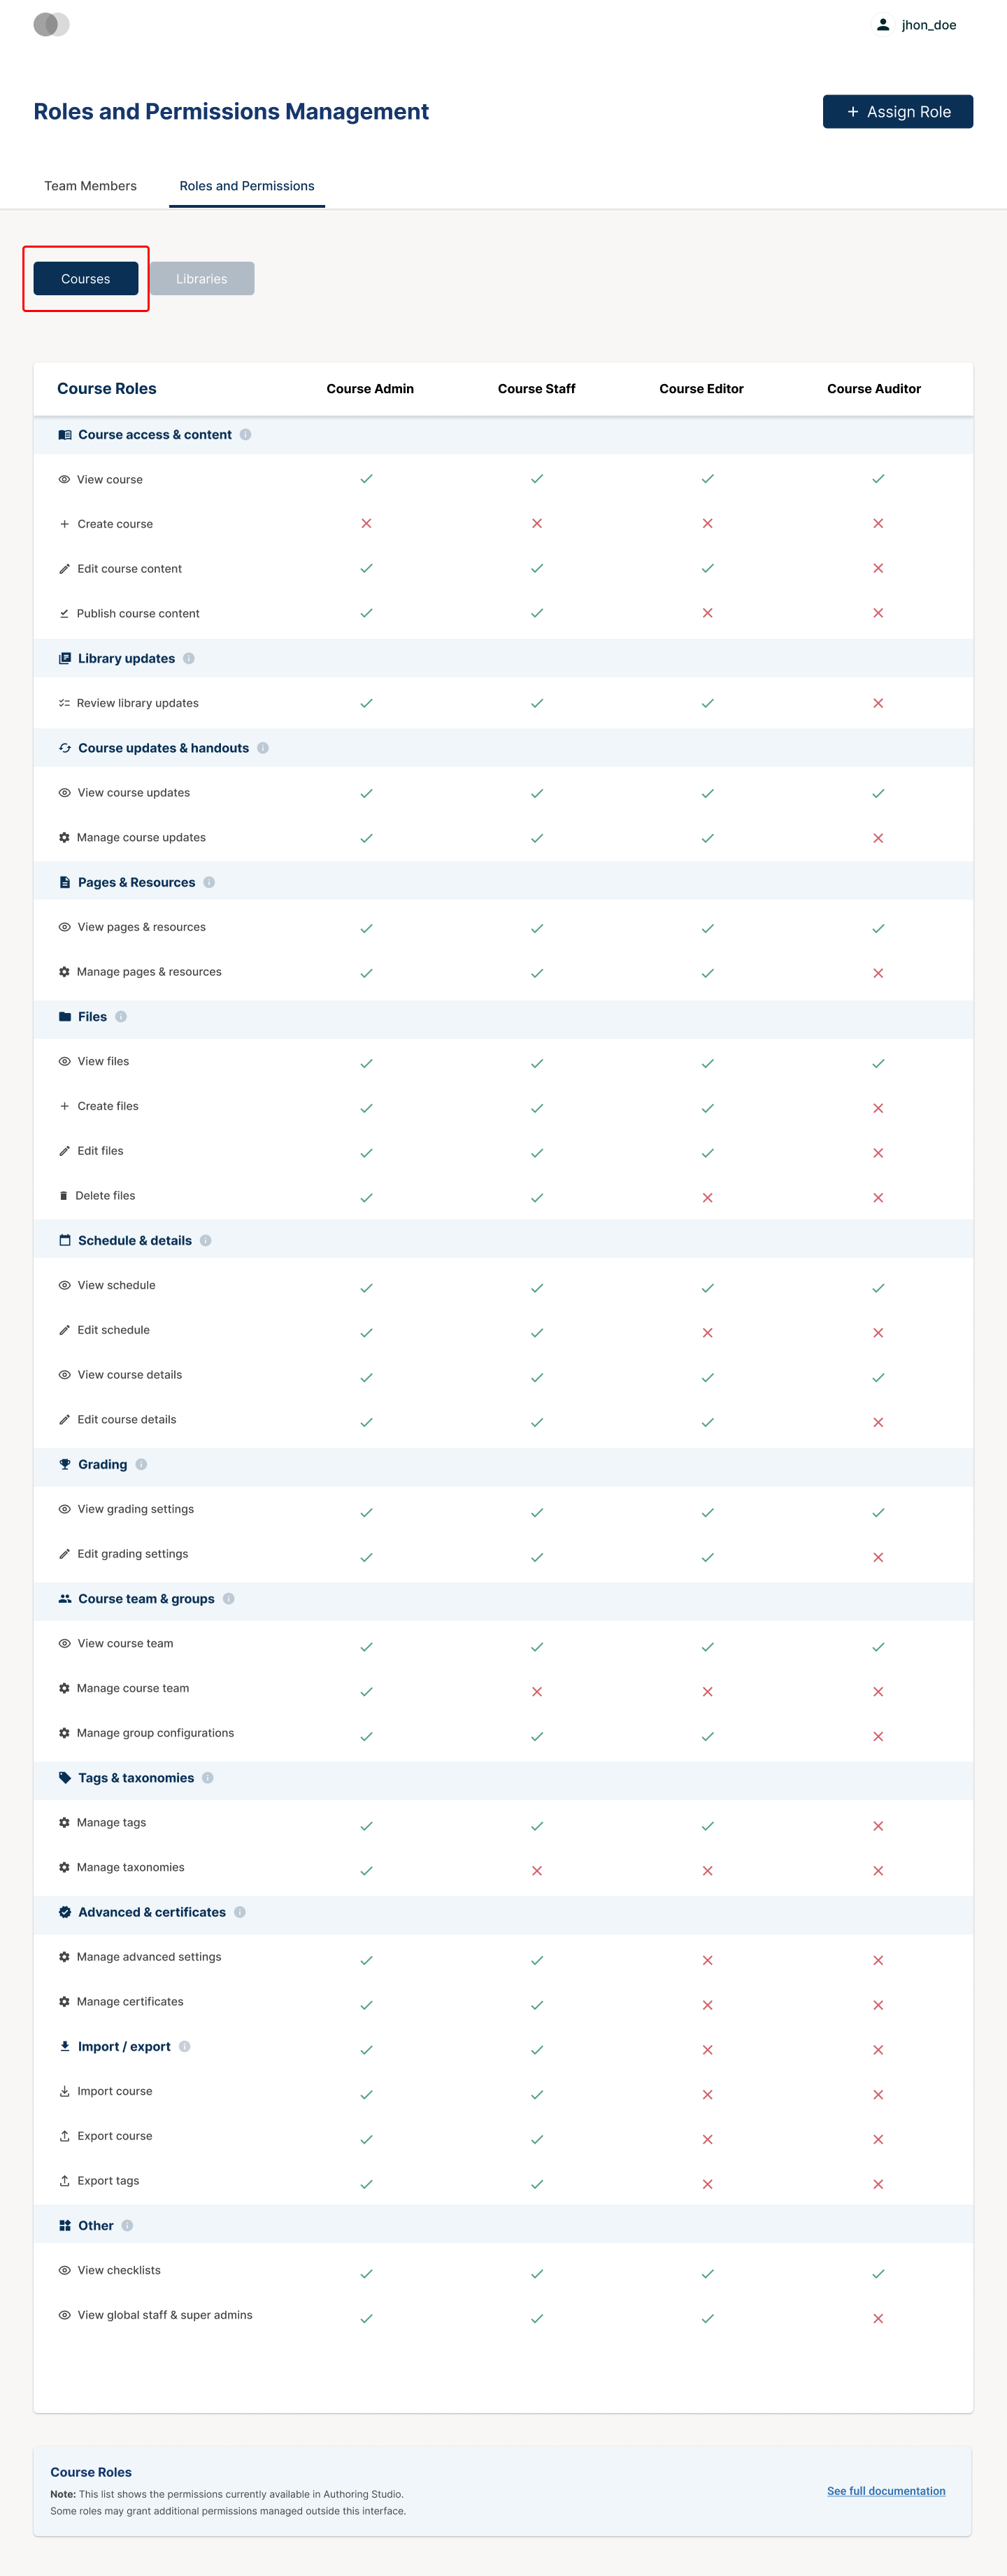
Select Course Roles or Library Roles at the top of the tab to switch between the two views.
For course roles, the matrix columns are: Course Admin and Course Staff. Each row represents a permission. A checkmark (✓) means the role has that permission. An X means it does not.
Note
This list shows the permissions currently available in Authoring Studio. Some roles may grant additional permissions managed outside this interface. See Guide to Course Team Roles for full documentation.
Assign a Role#
The Assign Role button is available from any tab in the console. Selecting it opens the Assign Role wizard.
In Step 1: Who and Role, enter one or more usernames or email addresses, separated by commas, and select the role to assign. Users must have an existing account. If any entry does not match a user, the input shows an error and blocks the flow until corrected.
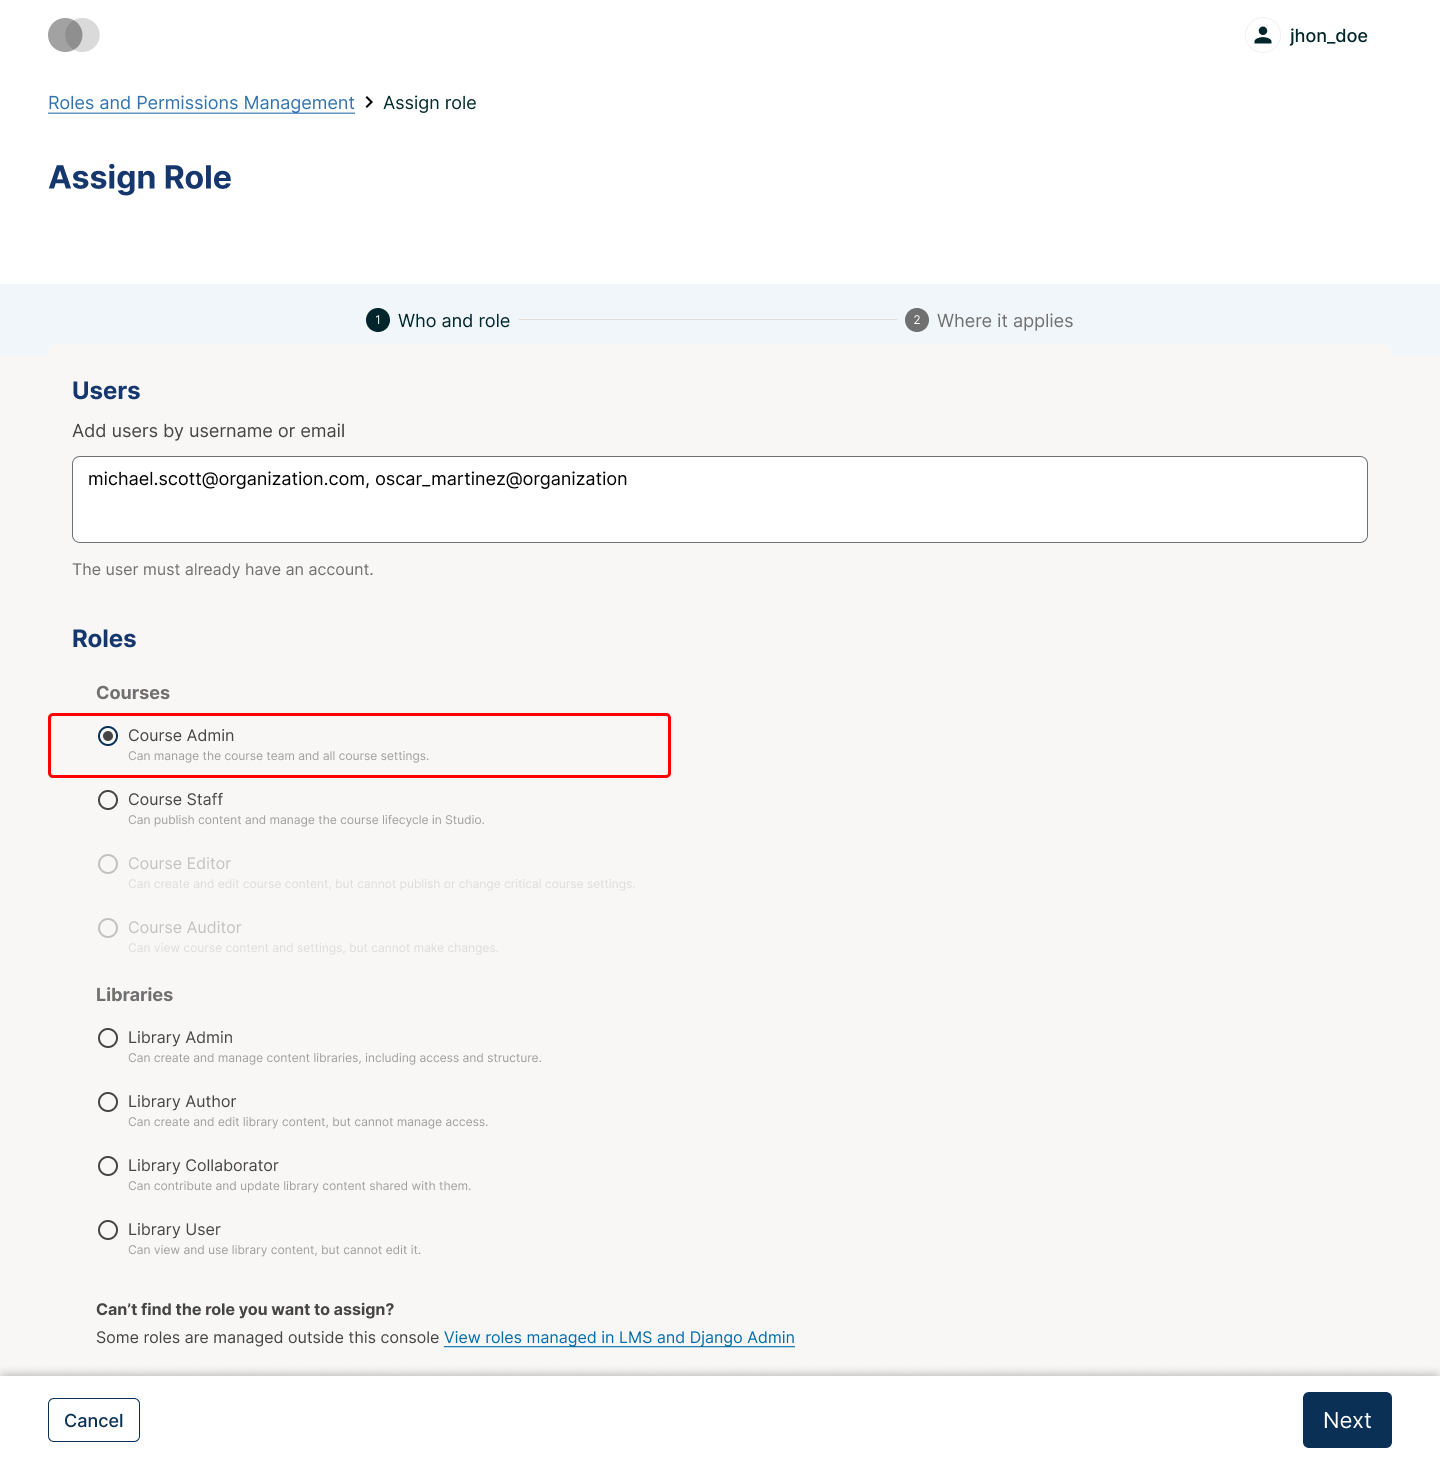
Select Next.
In Step 2: Where It Applies, select the courses or libraries to apply the role to.
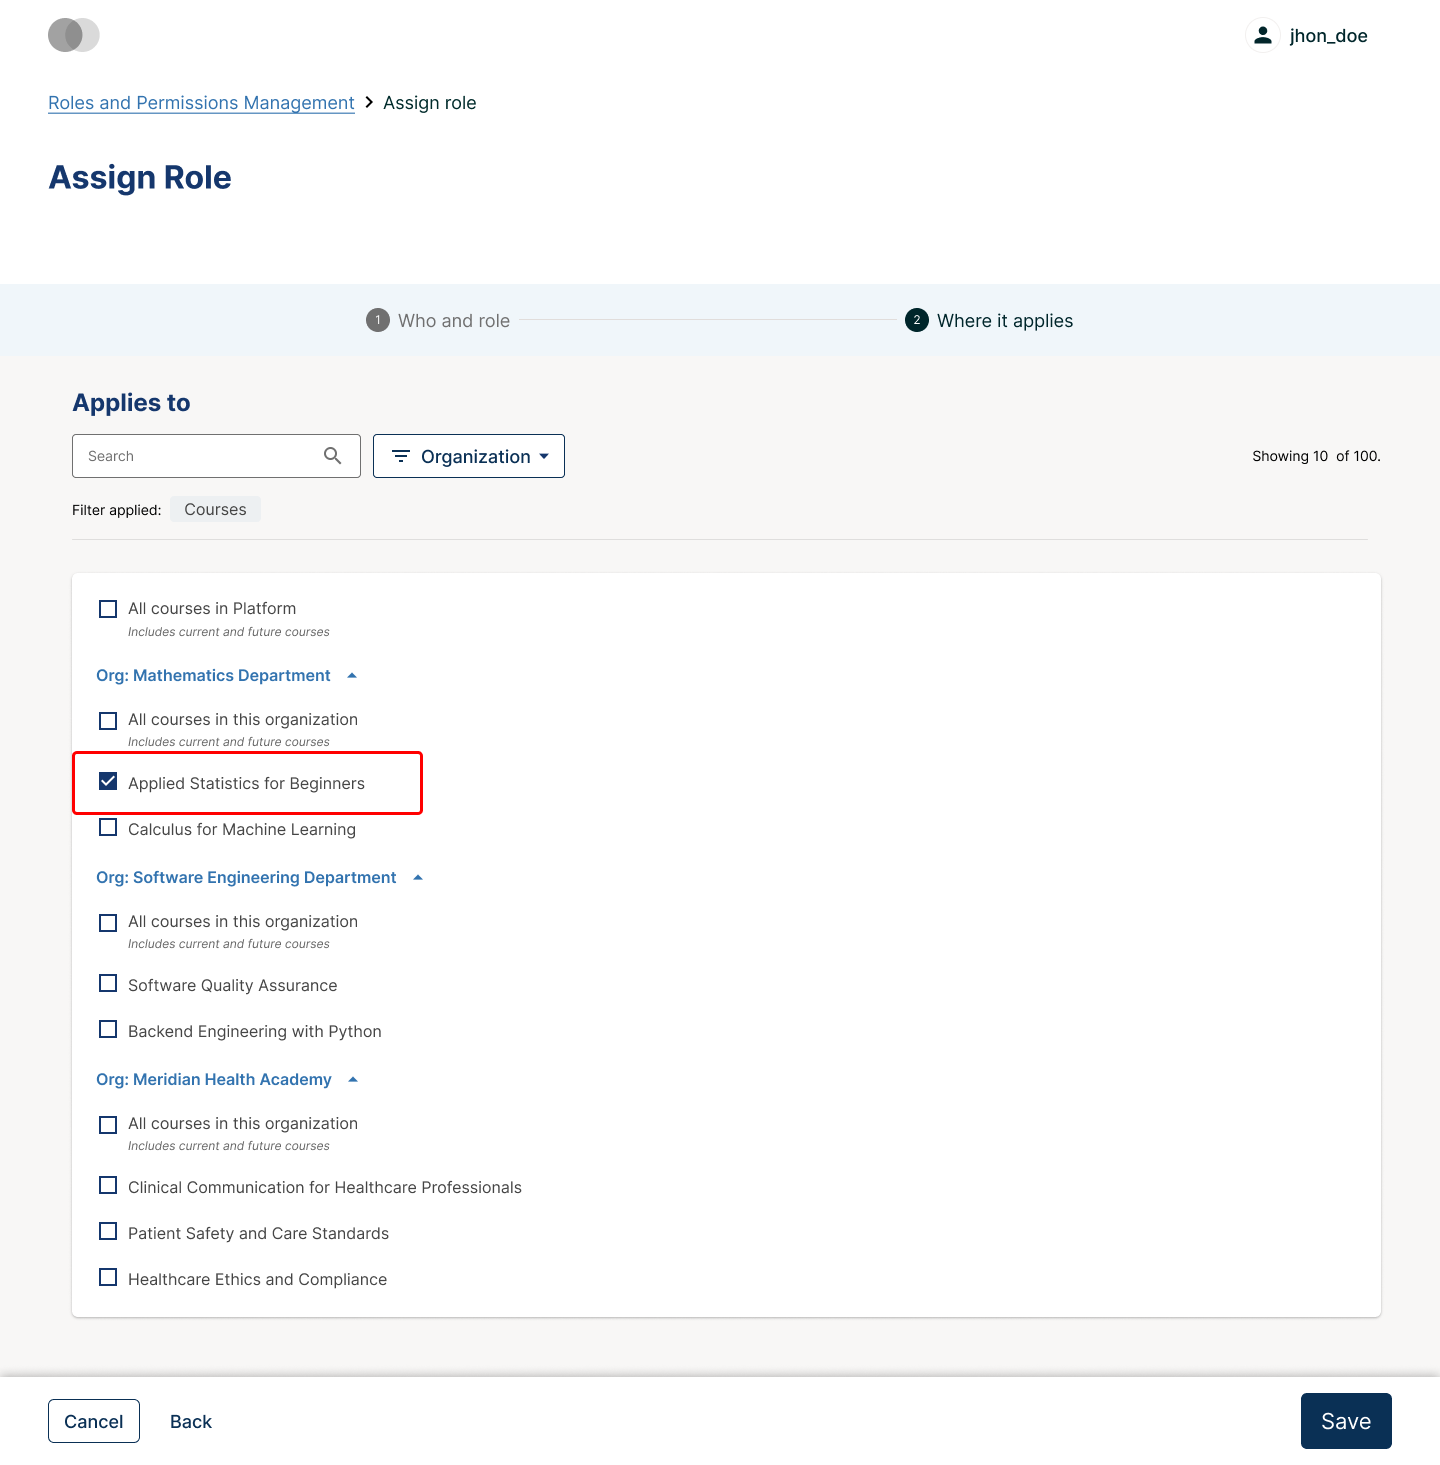
If you have management permissions at the organization level, you also see an All courses in this organization or All libraries in this organization option. Selecting this assigns the role to every course or library in that organization, including ones created in the future.
Note
The courses and organizations available here reflect where the Course Authoring feature is actually enabled. If a role assignment doesn’t seem to take effect right away, check with your site operator — this can happen briefly during a flag change.
Select Save. The new role assignments appear in the Team Members table.
See also
Manage Course Authoring Roles (how-to)
Manage Library User Access (how-to)
Guide to Course Team Roles (reference)
Maintenance chart
Review Date |
Working Group Reviewer |
Release |
Test situation |
2025-07-30 |
eduNEXT |
Verawood |
Pass |